|
Learn all Excel Alignment Group features to professionally format your spreadsheets. This comprehensive tutorial covers text alignment, cell merging, text wrapping, and advanced formatting options. |
|
The Excel Alignment Group is located on the Home tab and contains essential options for formatting text in your spreadsheets. You can align text vertically and horizontally, rotate text, manage word wrap, merge cells, and adjust indenting for professional-looking documents.
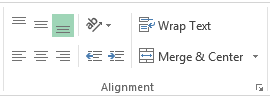
Excel Alignment Group Buttons Overview
| Button/Feature | Description and Usage |
|---|---|
 |
Vertical Alignment Buttons – Align text to the top, middle, or bottom of cells. Essential for creating professional-looking headers and data presentation. |
 |
Text Orientation Button – Rotate text at various angles within cells. Perfect for creating angled headers or fitting more text in narrow columns. |
 |
Wrap Text Button – Automatically wrap long text across multiple lines within a single cell, eliminating text overflow issues. |
 |
Horizontal Alignment Buttons – Align text to the left, center, or right side of cells for consistent formatting across your spreadsheet. |
 |
Indent Buttons – Decrease or increase text indentation within cells to create hierarchical data structures and improve readability. |
 |
Merge & Center Button – Combine multiple cells into one and center content, ideal for creating spanning headers and titles. |
Three Ways to Fit More Text in Excel Cells
When your text doesn’t fit within a cell, Excel provides three effective solutions:
- Word Wrapping – Automatically wraps text to multiple lines within the same cell
- Shrink to Fit – Reduces font size to fit content within the current cell dimensions
- Merge Cells – Combines multiple cells to create more space for your content
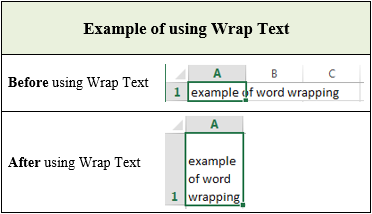
How to Use Excel Word Wrap Feature
Excel’s Word Wrap feature automatically breaks long text into multiple lines within a single cell, preventing text overflow and maintaining clean spreadsheet formatting.
Steps to Enable Word Wrap:
- Select the cell(s) where you want to enable word wrapping
- Navigate to the Home tab in the Excel ribbon
- Click the Wrap Text button in the Alignment group
- For manual line breaks, press ALT + ENTER at your desired break point
Pro Tip: When word wrap is enabled, text automatically adjusts when you change column width, ensuring your content always fits perfectly.
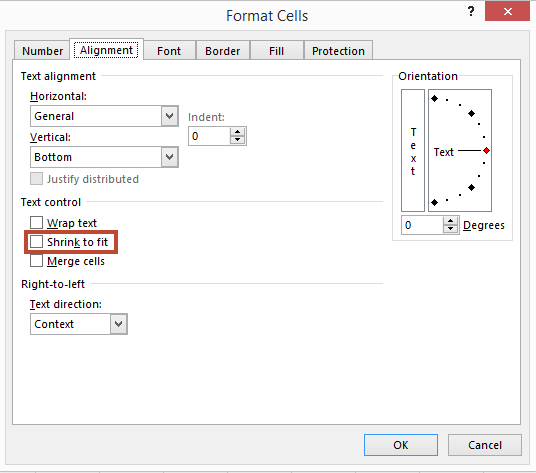
Excel Shrink to Fit: Automatic Text Resizing
The Shrink to Fit option automatically reduces font size to ensure all content fits within the current cell dimensions. This feature is particularly useful for maintaining consistent column widths while accommodating varying text lengths.
How to Access Shrink to Fit:
- Right-click on the selected cell(s)
- Choose Format Cells from the context menu
- Navigate to the Alignment tab
- Check the Shrink to fit option
- Click OK to apply
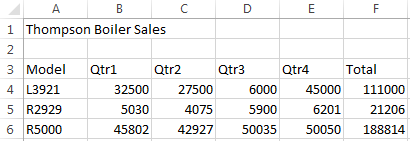
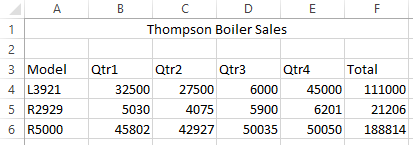
| Shrink to Fit Examples |
|---|
Before Shrink to Fit:
|
After Shrink to Fit: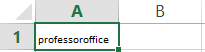
|
|
Access the Shrink to Fit option through the Format Cells dialog box. You can also enable Wrap Text from this same location for more formatting control. |
|
Excel Merge Cells: Creating Spanning Headers
Merging cells in Excel allows you to combine multiple adjacent cells into one larger cell, perfect for creating professional headers, titles, and improving spreadsheet layout.
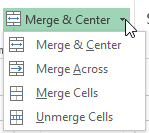
Three Types of Cell Merging:
- Merge & Center – Combines cells and centers content horizontally
- Merge Across – Merges only horizontally adjacent cells without centering
- Merge Cells – Combines both horizontal and vertical adjacent cells
Merge & Center Example:
Before Merging:
After Merging:
How to Merge Cells:
- Select the range of cells you want to merge
- Navigate to the Home tab
- Click the dropdown arrow next to Merge & Center
- Choose your preferred merge option
Important: When you merge cells, only the content from the upper-left cell is retained. Content in other cells will be deleted.
Excel Text Alignment: Vertical and Horizontal Options
Proper text alignment is crucial for creating professional-looking spreadsheets. Excel provides comprehensive alignment options for both vertical and horizontal positioning.
| Alignment Type | Options Available |
|---|---|
|
Vertical Alignment: Top, Middle (Center), and Bottom alignment options for positioning text within cell height. |
|
Horizontal Alignment: Left, Center, and Right alignment options for positioning text within cell width. |
Text Indentation Controls
 |
Decrease Indent – Reduces text indentation from the left cell border |
 |
Increase Indent – Adds more space between text and the left cell border |
How to Rotate Text in Excel
Text rotation in Excel helps you create visually appealing headers, fit more content in narrow columns, and improve overall spreadsheet design.
Quick Rotation Options:
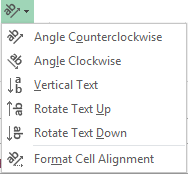
Custom Rotation Angles:
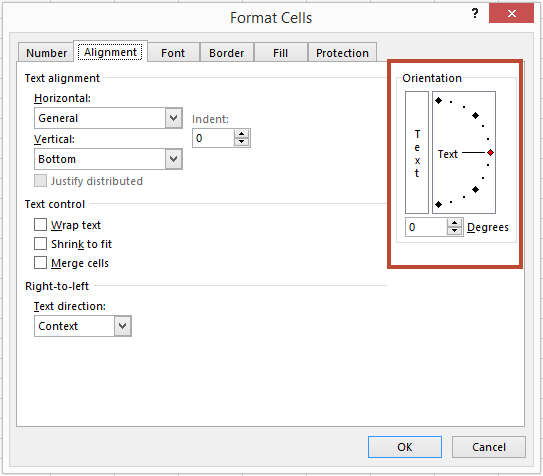
For precise control over text rotation, use the Format Cells dialog:
|
The Orientation section allows you to set exact rotation angles by dragging the indicator or entering specific degree values.
|
|
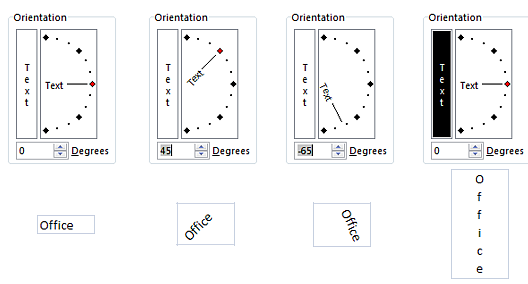
Note: When you rotate text, Excel automatically adjusts the cell height to accommodate the rotated content.
Advanced Alignment Options in Format Cells
The Format Cells dialog provides additional alignment options not available in the ribbon, giving you precise control over text positioning and formatting.
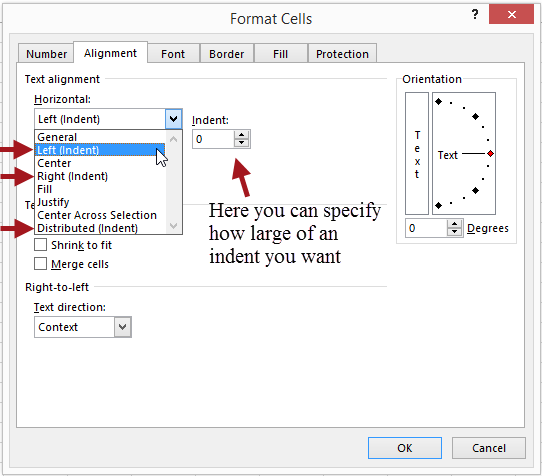
Additional Horizontal Alignment Options:
- Distributed: Adds equal spacing on both sides of cell content
- Justify: Spreads multi-line text evenly from left to right borders
- Custom Indentation: Set specific indent values for precise positioning
|
Justify Alignment Example: When using justify alignment with multiple lines of text, Excel adjusts word spacing to align text with both left and right cell borders, except for the last line. |

|

